Occasionally, every admin has to create a report for their boss. If you are in need of the list of all VMs in your vSphere environment, there is an easy way to export that to CSV file using Powershell.
To start, you have to install VMware PowerCLI module from Powershell Gallery:
Open Powershell command prompt as Administrator and run following command:
Install-Module VMWare.PowerCLI -Scope CurrentUser
Now that PowerCLI module is installed, you can connect to vSphere using Powershell.
Open Powershell command prompt
Enter following command:
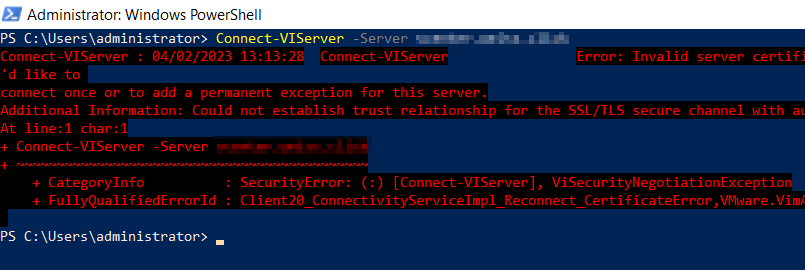
Connect-VIServer -Server server.name
If your vSphere appliance is using self-signed certificate, you may receive error message below.
In this case use following command to connect: Connect-VIServer -Server server.name -Force
You will be asked to provide credentials.
Once credentials are verified, you will be connected to vSphere appliance.
Now that you are connected to vSphere, you can export list of all VMs to CSV file. To do this, please enter following command:
Get-VM | Export-Csv .\VMList.csv
This will export all information about VMs to CSV file. In most cases you don’t need all that information and you will only want to export specific properties. To get list of properties that can be exported, use following command:
Get-VM | Get-Member -MemberType Property
Once you have that list, you can export specific properties you are interested in. For example: